Monday, 6 July 2020

New Visible Image Stencils - Mesh It Up - Distressed Heart

Wishing everyone a very Happy Tuesday - it's my turn to blog so  I'd like to share this card I've made using the left over bits from sample making with the fab new stencils. These beauties are going to be released on July 17th and they are available for pre-order right now from Visible Image.
This is a simpler version of one of my samples💖


Wednesday, 24 June 2020

Daily Arts Samples - Hochanda Tuesday 22nd June 2020

Here are the samples I did for the Daily Arts shows on Hochanda on Monday 22nd June 2020. I got to play with the fab mini mandala stencils, crackle lacquers, gloss varnish and the stunning pigment powders.


I used yellow and green distress inks through the stencil to make the flower heads, masking off the front 2 when inking up the ones at the back.

Drew in the stems and leaves with a black fine liner pen then drew around every inked shape - it took a while.

Then painted the leaves and stems, added some doodles with the black fine liner, used a grey alcohol pen to add some shadows.

The sentiment is a Cheery Lynn die.

Tuesday, 23 June 2020

An old video - Day of the Dead

This is a video of the samples I made for Sheena's Day of The Dead launch way back in 2016. I was on Sheena's DT for nearly 5 years and had a ball working with lots of fab releases, this one being one of my all time favourites. 


Hope you enjoyed this video and thank you for stopping by 😎 xxx

Monday, 22 June 2020

New Visible Image Stamps - Be Kind Card with Sunset Oxides


This is one of the first samples I have made as a brand new member of the Visible Image Design Team. I am so excited to have joined such a fabulous group. Anyway, enough about me onto the card making…..


Thursday, 16 January 2020

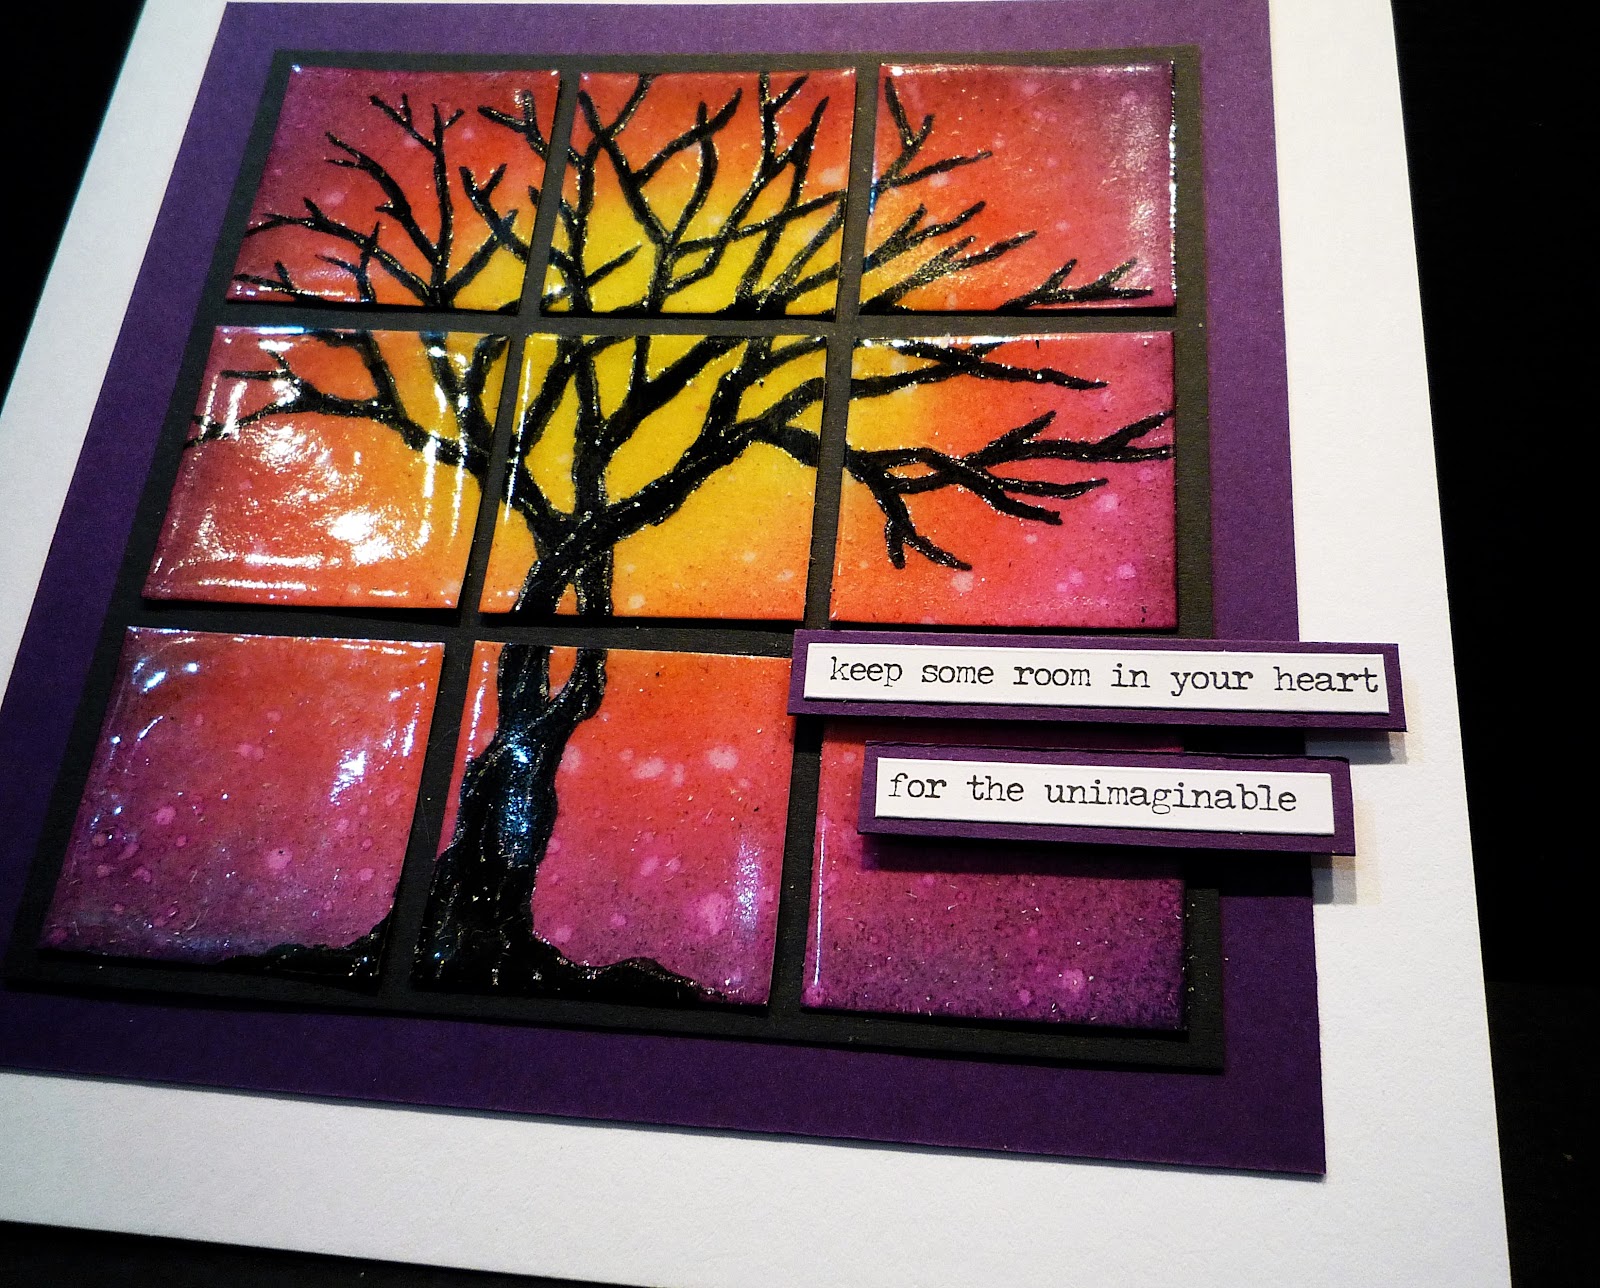
Triple Embossing

Triple Embossing

This is my take on on the Triple Embossing technique, it has been around for ages, probably since the invention of heat guns and thermographic powder. It can turn bits of inked up card into little jewelled creations - fabulous !! 

You will need 

Harmony inks/Distress inks
Sparkle gel pen
Finesse/Archival ink
Versamark/Finesse Embossing ink 
4 ½ inch square white card
Clear embossing powder
Black & purple card matts
Heat gun
Enjoy the Silence stamp
Blending tool & foams
Black Gesso
Pokey tool or Tweezers
Fine Paint Brush
7”x7” card blank & scrap paper

Swap out this tree silhouette for any of your favourite stamped images and play with this technique, it’s fun
Happy Crafting, Alison xx

Thursday, 10 November 2016

Cottage Garden Video

Here is a little video I made to show the samples I made for Sheena Douglass's Country Cottage Perfect Partners. I used Windows Movie Maker software which is old and a bit clunky but free.
This was my first foray into flower making using dies and they are fun to do.
Thanks for popping by xx

An Inky Snowflake card - for Inkettes Thursday 10/11/16

What makes an Inkoid happy? Lots of ink and Sheena stamps.
Today I played with Sheena's Ornate Snowflake set from the A Little Bit Scenic range.

I started off with a piece of  Sheena card cut to 5" x 5" and another long bit for the sentiment which I picked one from Sheena's A Little Bit Festive, Country Christmas set as it was a better size for my card design.


I stamped and heat embossed the different size snowflakes on the card using versamark ink and clear embossing powder, stamping off the edge in places. It's a bit difficult to see the snowflakes at the moment.

So let's get inking - I chose a couple of Tumbled Glass, Faded Jeans, Shaded Lilac, Picked Raspberry and our old favourite Chipped Sapphire for edging later on.


My favourite ink applicator is the round Ranger wooden one with the removable foam pads. It's better to start off the page on a slippy craft mat or glass mat before hitting your card, this stops you getting big round circles of ink. Try to leave a few gaps so you can get all your colours on.


It's fun to blend the colours into each other, Distress inks are perfect for this and play very nicely with Sheena card.
Once you have enough ink on the card it is time to add a bit of texture by spritzing water and taking it off with kitchen towel.


I added some glitz by splodging some of the clear Spectrum Sparkle pen onto my craft mat and sponging it over the card.


The photo doesn't really show the bling, but it is there honest :).

I also inked an extra bit of card for the sentiment and stamped and heat embossed this with white detail embossing powder. I used a white gel pen to fill in a bit of the M which was a bit faint.

The next step is to cut up the square card into 4 equal sections and darken all of the edges using Chipped Sapphire distress ink.


 I matted and layered each of the pieces onto black paper and silver mirri and glued them onto a 7x7 black card blank.


I'm reasonably happy with this design but maybe it needs a little something else. So I stamped some more snowflakes with versamark ink and white embossing powder on heat resistant acetate and cut them out. As usual the final faffing around takes longer than any other stage so waited until hubby came home from his council meeting before gluing any of these extras on.
I'll wait until tomorrow before taking another pic, hopefully the sparkle will show up.

Here's the final pic - hope you like it and thanks for dropping by xx


Visible Image - Sunny Birthday

 This week I've used the gorgeous Sunflower Grunge stamps from Visible Image to make a bright and sunny birthday card for my mum, Decemb...