

Colour your card with blue and green watercolour paints with blue at the top and various shades blended into each other.
You could use watercolour inks or distress inks too.
Dry with a heat gun.

Position the scribble stencil over a corner of your coloured card, apply white gesso or Cosmic Shimmer Matt white chalk polish through the stencil.
Move the stencil to a different part of your card and repeat this twice.
Dry your card again.
Dry your card again.

Pick 3 blue and green distress oxide inks and stamp the Visible Image Grunge Tones over your card.
Dry your card again.

Pat an anti static pad over your card
Stamp the border stamp on three sides of your card in versafine black ink and then heat emboss with clear embossing powder.


It will look a bit busy at the moment.

Pat an anti static pad over a piece of white card.
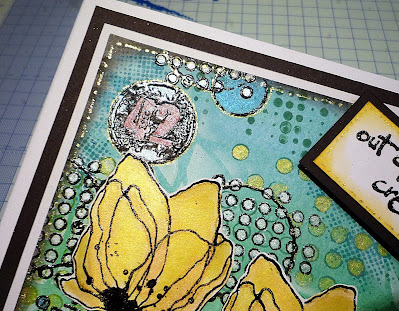
Stamp the chaos sentiment, 2 of the large flower heads and 3 of the small ones with black versafine ink and heat emboss with black embossing powder. Colour your flower heads with yellow and orange shimmer paints.


Glue this to a 7"x7" white card blank. (177mm x177mm)
Cut out the flower heads and sentiment.
Colour the edge of the white sentiment with yellow ink and matt it onto black card with a border of about 1/8" (3mm)
Colour the edge of the white sentiment with yellow ink and matt it onto black card with a border of about 1/8" (3mm)
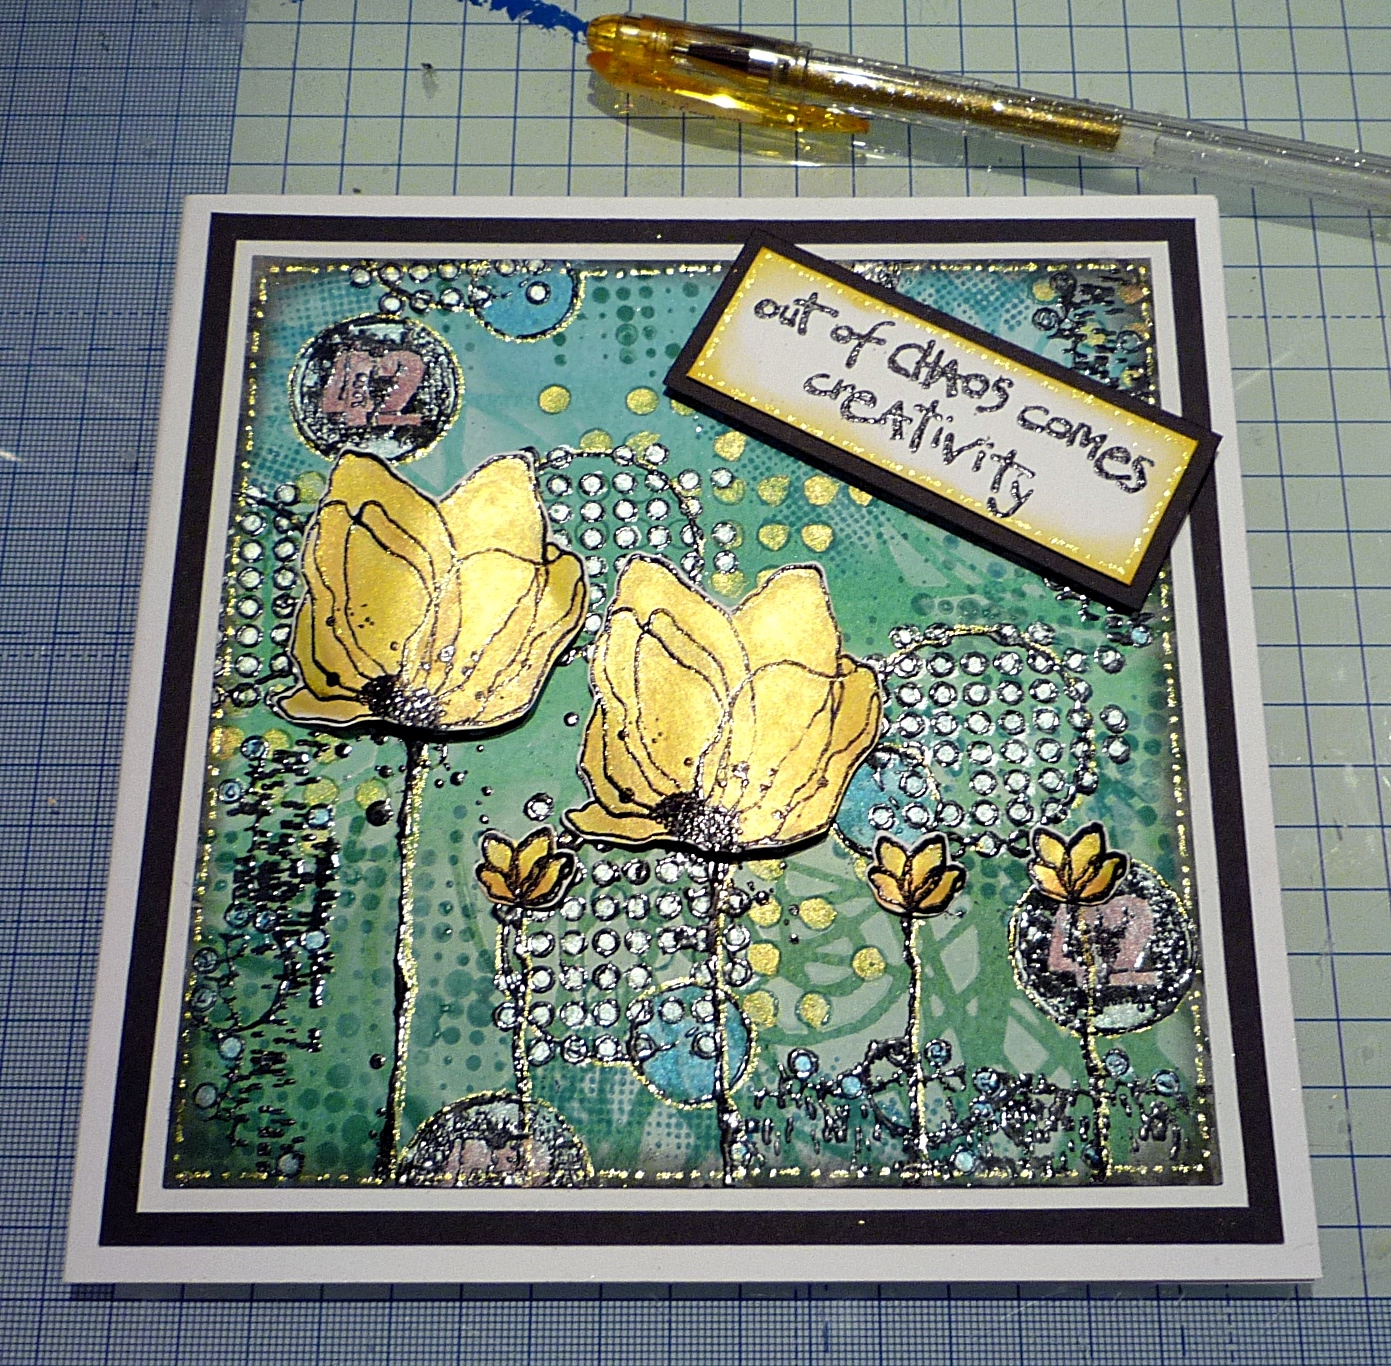
Use your fingers to curve the flower heads a little then fix them in place with 3d glue gel .
Attach the sentiment using 3d foam pads .
Doodle some faux stitching around the edges of your card and sentiment with a gold sparkle gel pen, draw around the large circles and add highlights to the flower stems and petals.
Admire the shine and shimmer under the lights. You could add glossy accents at this point too.

Very shiny....

With lots of layers ...


With lots of layers ...
My finished card ...

I hope you have enjoyed this project and thanks for stopping by 💖,
Ali xxx
You can purchase these stamps and stencils here https://visibleimage.com/
Items used
- Visible Image Stamps - Creative Chaos and Grunge Tones
- Visible Image Scribble Stencil
- White Nights Watercolours
- Cosmic Shimmer Iridescent watercolours - Carnival Brights (CSIWPSET2)
- Distress Oxide inks - Mowed Lawn, Peacock Feathers and Lucky Clover
- Cosmic Shimmer Matt White Chalk Polish (CSMCPOWHITE)
- Black Versafine ink pad
- Black and clear embossing powders
- Gold glitter gel pen
- Cosmic Shimmer Colour Cloud Blending Ink Midnight Clouds
- PVA glue, 3D glue gel and double sided foam pads
- Heat gun
- anti static pad
- black and white card
- 7" x 7" white card blank


No comments:
Post a Comment