Card Project Name : CE Paper Cuts Enchanted Forest
Design Team Member Name: Ali Carubia

Items Used:
CEDPC1189 CE Paper Cuts Enchanted Forest
FRCL219 Woodware Special Birthday Sentiments
CSPSPLIGHT Cosmic Shimmer Pixie Sparkles Boulevard Lights
VM-001 Versamark clear ink pad
CEWATER Watercolour Card
CSPMEPOLD Cosmic Shimmer Old Gold Embossing Powder 20ml
CSGLUE Cosmic Shimmer Dries Clear Glue
Also 7” x 7” white card blank, water mister, white card, black card, heat tool, foam pads,
antistatic pad, gold gel pen, low tack tape, die cutting machine, self healing mat, craft knife, steel edged ruler.
Steps :
Cut a piece of black card 145mm x145mm and another from white foundation card. Tape the Enchanted Forest die to the centre of the card using low tack tape. Run through a die cutting machine. Gently peel back the tape and poke out all of the cut pieces.
Repeat with the white piece but keep the white toadstool tops for paper piecing later on.Apply pva glue to the back of the black die cut scene using a fine tip applicator. Attach the two pieces so that the white shows slightly above and to the left of the black piece. Trim off any excess white card overhanging the sides of your card.


3. Cut a piece of watercolour card to 170mm x 170mm. Lightly spritz the back to keep it flat on your mat then generously spritz the front of the card.

4. Tap the Boulevard Lights Pixie Sparkles over the whole of the card. Spritz more water to explode the powders and add more Pixie Sparkles until you have a really good coverage. Then dry with a heat tool.

5. Use pva glue to attach your die cut scene to the bottom left corner of your sparkly card leaving a border of about 3mm (⅛”). This will leave a couple of good size strips of sparkly card over. Fix your forest panel to a black card matt leaving a border of 6mm (¼”).

6. Fix your forest scene to a 177mm x 177mm (7” x 7”) white card blank. Use a gold gel pen to draw a dashed line around the inside black panel to add more interest.

7. Use one of the strips to cut out around a dozen butterflies using the forest die.
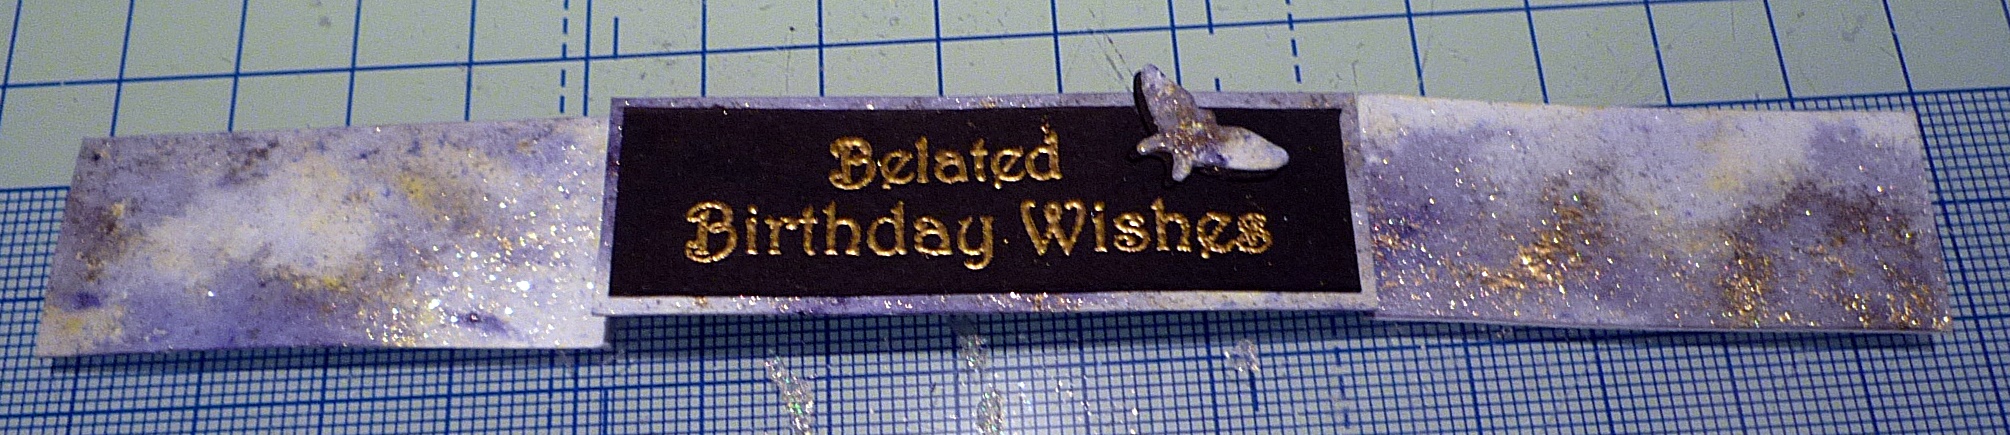
Stamp the belated birthday sentiment from the Woodware FRCL219 birthday stamps onto black card with versamark and heat emboss with gold embossing powder. Trim down so that you can matt it onto one of the excess sparkly strips.
8. Paper piece the white toadstool tops and fix your sparkly butterflies onto the top right of your card so it looks like they are flying out of the scene. Attach one of the butterflies to the sentiment and fix the sentiment, at an angle, to the top left hand side of your card with foam pads.
.

I hope you have enjoyed this tutorial,
thanks, Ali Carubia xxx


No comments:
Post a Comment